Unlimited Crafts resources

3 days money back guarantee

Pack 4 files

Support 24/7
RECOMMENDED FOR YOU
Shop Reviews
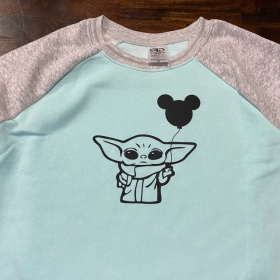
This item was easy to use with my cricut maker
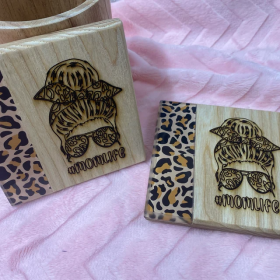
I love the quality of the files. It was super easy to work with.

Worked AMAZING! I use it ALL THE TIME!!ith.

Loved how these little bees 
Frequently Asked Questions
Go to Downloads. Click on the download button beside the bundle you want to download
When you download one file, it will come in .zip format. You will have to unzip it. In the unzipped file, you will find four formats – SVG, DXF, PNG, and EPS
PC: Right-click on the zip file and click “Unzip” or “Extract” (depending on your computer)
MAC: Simply double-click on the zip file and it will unzip.
iPhone: Download app ‘iZip’ from App Store. Unzip the file using the app. Import it into software app.
Android: Select the file and click on ‘Extract.’ Import to software app and use.
Our files come in four formats. DXF, SVG, PNG & EPS. You will find these formats in the zip file you download. At times, the SVG file has browser (Chrome or Internet Explorer) icon. You need to upload that in your software.
Yes, sure you can. In order to unzip your files, I’d recommend downloading WinZip from the app store. It’s way easier to use and you can extract the files from the zip. Once extracted, you can open your cutting machine software and import the SVG file you want to use in your new project.
To import an SVG file to your Cricut Library, first you will need to unzip the file:
How To Unzip SVG Cut File:
After you download the design, the first thing you need to do is unzip the files. You will not be able to proceed with using your files until you unzip them. In a nutshell, zipped (or compressed) files take up less storage space and can be downloaded more quickly than unzipped (or uncompressed) files. Immediately upon downloading your purchase, you will want to unzip the files in preparation for their use.
Instructions for PC
After you download, look at the icon for the zip folder. Zipped folders have the appearance of a folder with a little zipper on it. Right click on the folder, and you will see an option to “Extract All.” Clicking this option will begin the unzipping process. You will then see a prompt asking you where you would like to save your newly unzipped folder. If the destination is the same destination as the zipped folder, you do not need to browse, and just click Extract to begin unzipping. If you would like to place the unzipped files in a new spot on your computer, then browse to locate this Folder, and then click on Extract. After the unzipping process is complete, you will be left with TWO folders of your files. One will be the files still in the zipped folder. This folder can be deleted if you prefer, as the files are not usable in their zipped format. The other folder will be the unzipped and completely ready to use files. Note: The size of the download will determine how long it takes to complete the process. Computer speeds vary.
Upload to Design Space:
Open up Design Space in your internet browser. You do need an account with Cricut to use Design Space.
Next, click on the Upload Images icon on the left hand side. From there you will choose the image upload option on the left hand side and click on the blue icon to proceed with your upload. Browse for your file, select it, and click on Open. Once you have opened your file, a preview will appear in the box. You will then be prompted to change the image name if desired (it defaults to the file name from your computer).
You can also choose to add tags. Once you are satisfied with those edits, click on the green ‘Save’ icon to save your design to your library. On the next screen, you will see your library and any design you have uploaded. When you are ready to insert a design to your canvas, click on it (a green checkmark will indicate it is selected), and then select ‘Insert Images.’ Your design is now added to your canvas and is ready to edit and cut!
How To Unzip SVG Cut File:
After you download the design, the first thing you need to do is unzip the files. You will not be able to proceed with using your files until you unzip them. In a nutshell, zipped (or compressed) files take up less storage space and can be downloaded more quickly than unzipped (or uncompressed) files. Immediately upon downloading your purchase, you will want to unzip the files in preparation for their use.
Instructions for PC
After you download, look at the icon for the zip folder. Zipped folders have the appearance of a folder with a little zipper on it. Right click on the folder, and you will see an option to “Extract All.” Clicking this option will begin the unzipping process. You will then see a prompt asking you where you would like to save your newly unzipped folder. If the destination is the same destination as the zipped folder, you do not need to browse, and just click Extract to begin unzipping. If you would like to place the unzipped files in a new spot on your computer, then browse to locate this Folder, and then click on Extract. After the unzipping process is complete, you will be left with TWO folders of your files. One will be the files still in the zipped folder. This folder can be deleted if you prefer, as the files are not usable in their zipped format. The other folder will be the unzipped and completely ready to use files. Note: The size of the download will determine how long it takes to complete the process. Computer speeds vary.
Upload to Silhouette Studio:
After your files are unzipped, you are ready to begin using your files in Silhouette. Remember, Silhouette Basic Edition users will want to use the DXF files, and Silhouette Designer Edition users can use either the SVG or DXF files. There are three methods you can use to open your files. All of these methods require you to open up your Silhouette Studio software FIRST. Your files will not properly open unless you open from WITHIN Silhouette.
Method 1 :
This is the File>Open method. Open up Silhouette, and in the upper left hand corner click on the ‘File’ icon. Then scroll down and click on ‘Open.’ You will then navigate to the folder your file is located in, click the file, and select OK to open.
Method 2 :
This is the Drag and Drop method. It is very simple and all you need to do is Drag the file you would like to open into your Silhouette work area. If the file type is compatible with your edition, it will be placed in your work area where you dropped it.
Method 3 :
This is the Silhouette Library method. You can add any compatible file to your Silhouette Library so that you can place it in your work area without searching for it on your computer. To add a file to your library, open up Silhouette and click File>Import>Import to Library. You will then be able to search for the file you would like to add to your library. Click OK and your file will now be available to you to use at any time while working in Silhouette. Now, if the file you would like to use is already in your library, you can start a new project by opening up Silhouette and then clicking on the ‘Show Library’ icon located on the left hand side. Locate the design you would like to use, and double click it. The design will now be added to your work area.
ABOUT US
We are happy that you decided to visit our website today. Here at Trendiessvg, we design digital files that can be used for vinyl crafts, scrapbooking, papercraft, screenprints, and so much more! The digital files we offer come straight to you in formats that are compatible with Silhouette Studio Standard Edition, Silhouette Designer Edition, Silhouette Business Edition, and Cricut Design Space. Our digital products are formatted in SVG, EPS, and DXF for your convenience so that you can use them for any and all of your greatest craft projects. Thank you so much for visiting Trendiessvg!
Address: Devon Drive, Corpus Christi, Texas, 78415, US
Email: supports@trendiessvg.com
Mon – Sat: 9AM-5PM EST
